
There’s a lot that goes into planning, installing and finishing the plumbing in any construction project, so if you’re thinking about building your dream home, there’s a lot to think about. Today, we’ll break down the stages involved in making sure your new plumbing construction is just right.
There are 6 stages to work through when it comes to plumbing during construction, each taking place at different times during the construction process. They are: Design, plumbing rough in, installation of fixtures, connecting systems, testing and inspections and those all-important finishing touches.
Let’s break them down.
Design and Planning
Before anyone even thinks of laying hands on a pipe or wrench, there are important steps to take. Blueprints have to be drawn up, permits sought and obtained and materials have to be chosen.
Blueprints and Plans
The first step is for a detailed plan to be produced. Architects, builders and plumbers will work together to produce a blueprint, taking into account the specific plumbing needs of this particular construction project.
This plan ensures that when it does come time to start actually laying pipe, everyone involved knows exactly what should go where.
If you have specific requests, this is the best time to ask for them.
Permits and Regulations
Once the blueprints have been drawn up, they’ll be submitted to your local planning authority. This allows the bureaucrats to ensure that the plans, and the final plumbing system, meet the stringent regulations of the local building code.
While it may be tempting to think of this as interfering, the codes and regulations are there for good reasons: they keep you, your property and your neighbours safe. Faulty plumbing can lead to all sorts of problems so if they demand changes, listen to them. They know what they’re doing.
Material Selection
Once a plan is in place and has been approved, it’s time to go shopping.
Not all pipes and fixtures are made the same and there are few things to weigh out when selecting them. Ensuring the materials balance durability, suitability and cost as well as being compatible with any existing system can be tricky, so it’s best to take some advice rather than just opting for the cheapest thing available.
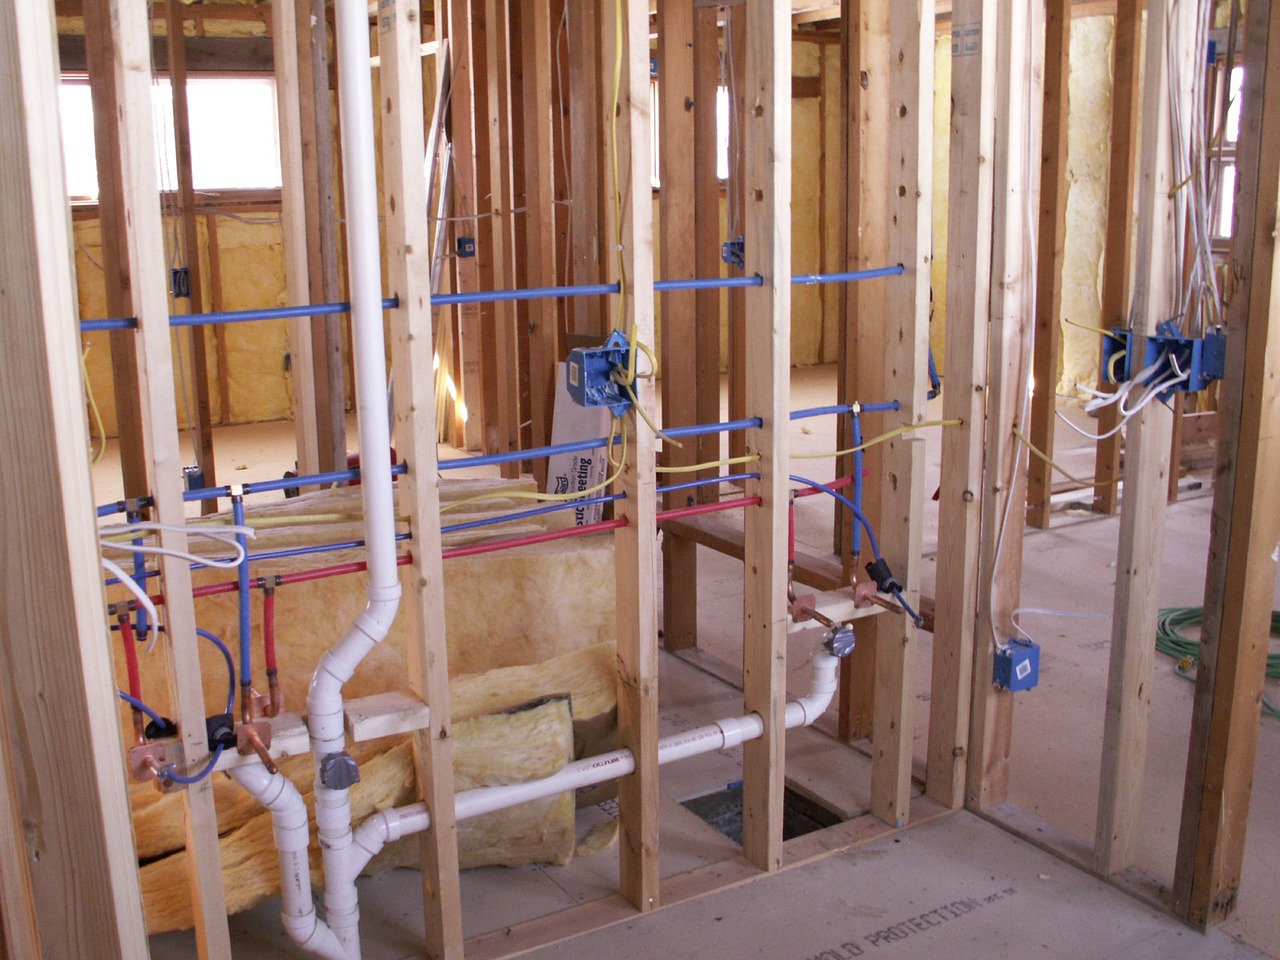
Rough-in Stage
The plumbing rough-in stage is actually really two stages: underground and above ground. Some locations allow this to be done at the same time but others require the underground rough-in plumbing work to be done early in the process.
Underground Rough-In
During this process the plumber will locate the main-line and sewage connections and determine where they will enter and leave the building. This means that the drains will be hooked up to the municipal sewers or septic tank and your water inlet will be placed.
Above ground Rough-In
This involves installing the drains, venting and waterlines within the building. It will also involve putting in shower bases, bathtubs and other heavy installations and needs to be done whether the plumbing is for a new construction or a basement conversion.
As part of this process your plumbers will cut holes in the walls, ceilings or floors to run lengths of pipe and connect everything up.
Your venting system will also be installed at this stage. This allows gas to escape safely (usually through the roof) rather than build up in your drainage system, causing problems with drainage and potential health risks.
This aspect of the plumbing is done before installing drywall, allowing easier access.
An Important Note
During the roughing-in phase, it’s important to ensure that everything is inspected and tested before moving on. Problems here may well end up ‘boxed in’ by drywall and take time to notice- time in which they could be wreaking havoc behind your walls.
Installation of Plumbing Fixtures
The next stage is where things start to take shape: installing the fixtures and fittings.
Here, bathtubs, showers, sinks, toilets and faucets will be placed and connected up according to the blueprints made in the first stage.
Your plumber will connect everything up to the water supply and drainage systems, ensuring that everything is leak-free as they go. Depending on the materials used, this might involve using chemicals to bond, ensuring connections are tight or that quick-fit pipes are properly bedded into their joints.
Making sure that everything is properly connected will ensure that your fixtures last for the long-haul.
System Connections
This can take place during a couple of phases of plumbing construction work, dependant on what exactly is being connected up.
Water heaters, boilers and underfloor heating will need to be connected up during the plumbing rough-in to allow the fixtures installation to happen. If your system is gas-fuelled, the gas main will also need to be roughed-in alongside the water and sewage.
This is potentially dangerous work as both electricity and gas can be hazardous, so the installation of these systems is heavily regulated. They will need inspecting to ensure compliance with local regulations and codes.
Later on during the construction process, appliances which rely on water such as washing machines and dishwashers can be installed alongside fittings like sinks and toilets. They will often use a branch from a sink’s installation to supply water and drainage, so it makes sense to carry this out at the same time.
Testing and Inspection
As we’ve mentioned throughout this article on the plumbing construction process, testing and inspecting work as you go is a vital part of any installation. A large part of the reason that it’s so important is that there will be a final test.
In order to ensure that your system can cope with the maximum pressures it should be subjected to and that there are no leaks, your plumbers will put it through a pressure leak test.
This involves closing off your system and filling it with compressed air. The pressure is measured while the test is on-going and allows your plumber to know whether there are any leaks, as well as whether the plumbing can cope with the pressure it will be subjected to when in use.
If the air pressure in your pipes drops during the test, it’s escaping somewhere and that needs to be rectified before water is introduced.
Once your plumber is happy, they can call in the officials to sign off on the system. They will probably want to run their own tests though some authorities may allow plumbers to self-certify their work. In either case, getting satisfactory results is vital.
Finishing Touches
Once everything has been put in place, rigorously tested and given the official OK, it’s time to add those all-important finishing touches.
This is the stage where everything is neatened up, sealed and generally finished off. Silicone sealants are applied to joints around fittings, ensuring that they’re watertight, holes are caulked up and everything is basically put in order.
This ensures not only a clean, professional finish but makes sure that the risk of future leaks and all their attendant problems is minimized.
Pipe Insulation
If you live in an area that’s prone to extremes of temperature, particularly periods of freezing weather, this is the stage to ensure that any exposed pipework is properly insulated. Pipes which freeze are prone to bursting as they thaw (a common misconception is that it’s the ice that breaks them when in fact this is pretty rare- it’s the sudden rush of water as the ice breaks that causes most damage).
Wrapping exposed pipework, especially anything that is outside the walls of your home, in insulating jackets minimizes the risk of freezing.
It’s also a good idea in warmer climates too, though not quite as vital, as heat can cause metal and plastic to expand and over time, this pattern of expansion and shrinking will loosen joints.
While it’s particularly important to ensure that pipes are insulated in more extreme climates, it’s worth considering in more moderate climbs too.
Insulation is relatively cheap and easy to install and, while it’s usual purpose is to protect your pipes, it can help alleviate heat loss too. This means that your hot water will be hotter, requiring less fuel to heat it and giving a great quality of life boost for minimal effort.
Once all those stages have been completed to the plumbers, authorities and your own satisfaction the plumbing element of construction is completed, and the systems should be ready for use.
Plumbing After Construction
Now that everything is up and running as it should be, there is one final step to consider: keeping it that way.
While not technically part of the plumbing construction process, regular inspections and maintenance is never a bad idea to ensure that any problems are dealt with before they spiral and that you get many, many happy years from your plumbing after the construction process is finished.